This user guide is for buyers managing multiple stores with centralized product and supplier management.
This guide aims to walk you through the main functionalities of the Forager platform for Multi-store buyers. Unlike Store-level buyers, our Multi-store buyers have centralized control over product and supplier visibility for all of their locations.
You can review our Store-level user guide here.
Watch our short overview video for a quick walk-through of Forager's platform.
As a first step, you will get an email notification when your account has been activated and is ready to go. This email will include a request for you to set your own user password after which you will be able to login to Forager.
We recommend saving this page under your bookmarks to make it quick and easy to access in the future. If you can't find the login link, you can also access our login page through the login button in the top navigation bar of our website.
When logging in you will always start on the home tab which we will refer to as the Dashboard page.
In order to navigate through the platform you'll want to use the side menu bar as well as the top navigation bar.
Side Menu Bar
Top Navigation
The side menu bar defaults to the compact view without icon labels. Click the hamburger menu icon [☰] on the top left of the screen to expand the side menu.
The Products page has multiple tabs to help you navigate your product lists.
Finding a product is easy with our product search bar and filters.
You can search for any product by:
We also provide standard product category filters to narrow down the search results.
Lastly, you can also sort your search results by clicking on the column headers.
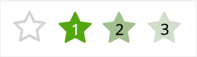
A key feature of our Products page is the ability to save favorites using a star ranking system. You can easily mark a product as a favorite by clicking the star icon next to each product. This ranking will be saved for the selected product and visible for all other users, which makes it a great way to help your Store-level buyers know which products are the top choice.
Marketplace products are products from new suppliers. These products will be highlighted in green and marked with the marketplace icon next to the supplier name. If you just want to browse marketplace products you can select the Marketplace tab.
If you identify a product from a new supplier that you want to review in more detail you can reach out to Forager's customer success team for more information.
The default product list view does not show all of the product information. If you need to see a more detailed product description or check other details such as the UPC you can do this for an individual product or for the whole list.
Apart from accessing the product details that are provided by the supplier, it's helpful to be able to leave your own comments for each product. Simply click on the note icon in the far right column to add a note or to enter a customer product ID. This information is shared by all users and set to read-only for Store-level buyers.
As a Multi-store buyer you can add a custom product ID to any product using the note icon in the far right column. This code is searchable on the Products page as well as for orders and invoices.
The default for all products that are added to Forager by your suppliers is "hidden". This means that the product will not show up on store-level product lists. The visibility status of a product is shown in the left-hand column of the Products page table and any changes to this toggle will immediately impact store-level product visibility.
Marketplace products do not have a visibility toggle as they should not be available for Store-level buyers to purchase.
Simply click on the visibility toggle of the product you would like to make available for purchase at your stores. As a default, any product that is set to visible will be available at all of your stores. You can however, add exceptions by using the store exceptions column where you can select individual stores which should not see the product.
Please note, store-level product exceptions are also impacted by store-level supplier exceptions (review our Managing suppliers section for more information). If you add a store exception at the supplier level, you will not be able to edit the store's product level visibility for that supplier's products. Store exceptions at the supplier level override any existing product-level settings.
Similarly to step 2, simply click on the product visibility toggle to hide a product. This change will immediately impact the store-level product list and block any products from being purchased that are currently in the shopping cart of a Store-level buyer. Orders that have already been placed will not be affected by changes in product visibility.
The Orders page has multiple tabs to help you track your order status.
You can easily search for specific orders by store, supplier, UPC code and custom product ID.
As a Multi-store buyer you can access and edit any of the orders placed by your Store-level buyers. Simply click on an order to open the Order details page. Any changes that are made to the order will be tracked in the conversation module below the order.
Keep in mind:
Multi-store buyer accounts are not designed to place orders for stores, however you can access the full functionality of a store-level account via the location icon in the top right navigation menu. Accessing a store-level account will allow you to place an order for the store you're currently viewing.
The Invoices page has multiple tabs to help you track your order status.
You can easily search for specific invoices by store, supplier, UPC code and custom product ID.
Once an order has been marked at received it will automatically show up as a new invoice.
Invoices can be approved and paid in two ways:
Invoices that are scheduled for payment are automatically paid based on the net payment terms defined on the My Suppliers page for each individual supplier. Payments typically begin processing 3-5 days prior to the due date of the invoice.
Invoices need to be approved before they can be scheduled for payment. The payment date is automatically determined by the net payment terms defined on the My Suppliers page.
Both the Orders and Invoices pages allow users to export data in various formats.
In order to initiate an export, select the order(s) that you would like to export by checking the boxe(s) in the left hand column or by checking all boxes using the check box in the column header. Once selected, the Export button will become active and you can select your preferred export format.
Available export formats:
The export functionality is most commonly used to:
The My Suppliers page has multiple tabs:
Each supplier profile includes key data points to help you get a quick overview of your relationship with individual suppliers. You can expand a supplier profile by clicking on the supplier name. This will reveal additional content such as the supplier logo, delivery schedule and their latest update.
This is also where you can set the preferred payment terms of each supplier. This will determine the payment date that is automatically set by Forager once an invoice is approved and scheduled for payment.
Similar to the Products page you can save a shared note for each supplier that will be visible for the rest of your team. These notes are read-only for Store-level buyers.
Similar to adding store-level exceptions to products you have the ability to add store-level exceptions at the supplier level on the My Suppliers page. If you add a store to the list of exceptions for a specific supplier, the products from that supplier will automatically be hidden for that store. This can simplify your product visibility management and is especially useful for stores which may have limited supplier access due to their location.
It is worth noting that if you add a store-exception to a supplier, you will not be able to edit the store's product level visibility for that supplier's products. Store-exceptions at the supplier level override any existing product level settings.
As a Multi-store buyer you will not receive any email notifications.
You can reset your password via the login page > select reset password under the login button. The email to reset your password will come from noreply@forager1.com so if you don't see it right away, be sure to check your junk folder.
Forager is not currently optimized for mobile devices but can be accessed through any browser app on your mobile device or tablet.